Every dog needs a handful of reliable commands. Not because obedience is the point of having a dog - but because these five behaviors keep your dog safe, make daily life easier, and build a communication system between the two of you.
I am talking about sit, stay, come, down, and leave it. These are not party tricks. A solid recall can save your dog’s life when they bolt toward a road. A reliable “leave it” stops them from eating a chicken bone off the sidewalk. And “stay” gives you the ability to manage almost any situation - from greeting guests at the door to waiting calmly at the vet.
This guide breaks each command into clear, step-by-step instructions using positive reinforcement. No force, no intimidation, no dominance-based nonsense. Just treats, timing, and patience.
If you are brand new to dog ownership, pair this article with our new puppy checklist for a complete start-to-finish game plan. And for the full training philosophy behind everything you will read here, head to our complete dog training guide.
Before You Start: The Training Setup
Good training starts before you give a single cue. Here is what you need to set up for success.
Gather Your Supplies
- High-value training treats. Small (pea-sized), soft, and something your dog loves. Freeze-dried liver, small pieces of cooked chicken, or commercial training treats all work. Avoid large, hard treats - your dog should be able to eat them in one second.
- A treat pouch. Clip it to your waist so you can deliver treats quickly without fumbling through your pockets.
- A quiet space. Start indoors with minimal distractions. The kitchen or living room works perfectly.
Understand Your Marker
A marker is a signal that tells your dog, “That exact thing you just did earned you a reward.” You have two options:
- Clicker: A small device that makes a consistent click sound. Precise and clear.
- Verbal marker: A short, distinct word like “yes.” Always available and convenient.
The rules: marker always comes immediately after the desired behavior (within one second), and it is always followed by a treat. Marker equals treat, no exceptions.
Session Length and Frequency
Keep sessions to three to five minutes. Dogs learn better in short, focused bursts than in long, tedious sessions. Two to three sessions per day is ideal. Always end on a success - even if you have to make the last rep ridiculously easy.
Command 1: Sit
Sit is the easiest command to teach and the most versatile. Your dog will use it a dozen times a day - before meals, before crossing streets, before greeting people, before getting their leash clipped on.
Step-by-Step
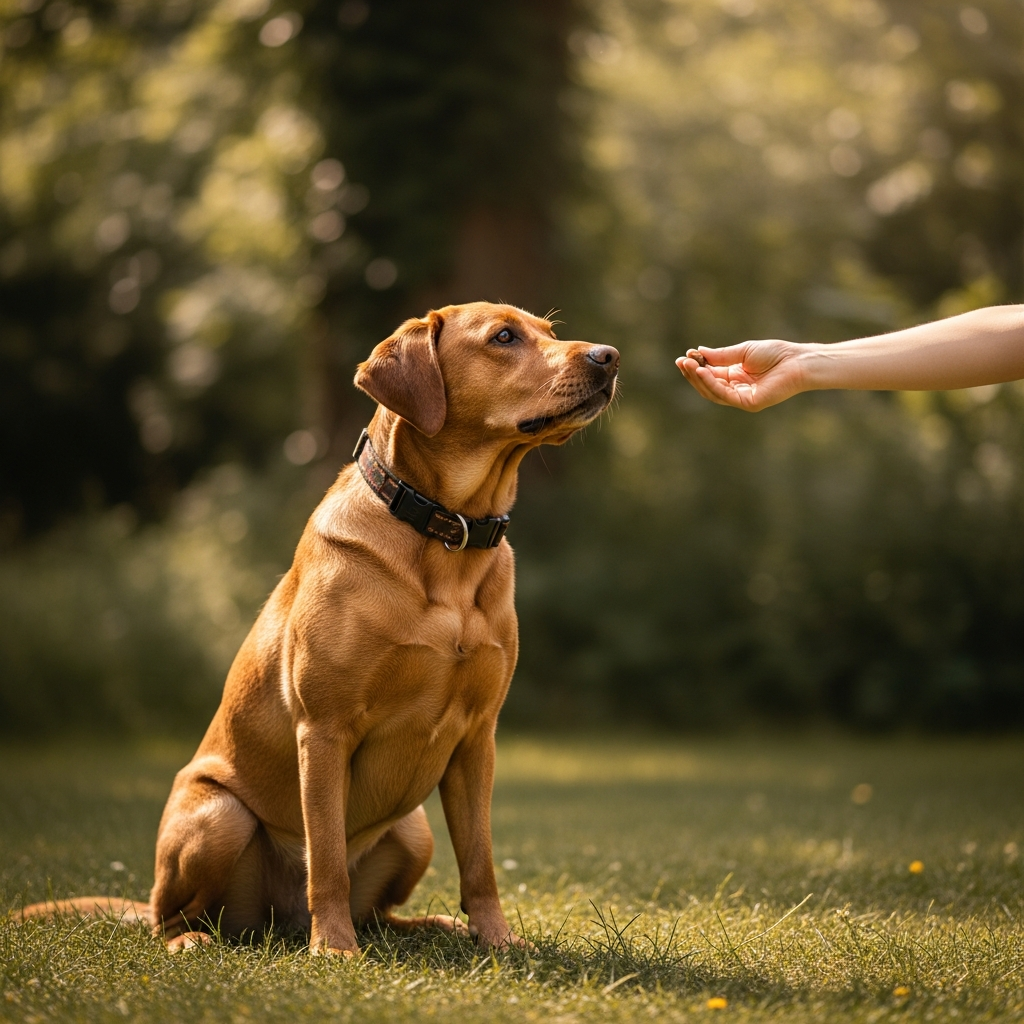
- Hold a treat at your dog’s nose. Let them sniff it but not take it.
- Slowly raise the treat above and slightly behind their head. As your dog’s nose follows the treat up, their rear end naturally drops down.
- The moment their rear touches the floor, mark and treat. Click (or say “yes”) and give them the treat immediately.
- Repeat 5 to 10 times per session. Most dogs start anticipating the sit within a few repetitions.
- Add the verbal cue. Once your dog is reliably sitting when you lure them, start saying “sit” just before you move the treat. After a few sessions, try saying “sit” without the lure.
- Fade the lure. Gradually reduce the hand motion until your dog responds to the verbal cue alone. Keep rewarding - just stop guiding them with food.
Troubleshooting
My dog jumps for the treat instead of sitting. You are holding the treat too high. Keep it closer to their nose and move it back more slowly.
My dog backs up instead of sitting. Try it with a wall behind them so they have nowhere to go but down.
My dog already knows sit but does not do it when I ask. You probably have a proofing problem, not a knowledge problem. Practice in different rooms, then in the yard, then on walks. Each new environment is a new classroom.
Command 2: Stay
Stay teaches impulse control. It tells your dog, “Hold this position until I release you.” It is incredibly useful at doorways, while you prepare their food, or when you need them to remain in one spot for safety.
Step-by-Step
- Ask your dog to sit. (This is why you teach sit first.)
- Hold your palm flat toward them like a stop signal and say “stay.”
- Wait one second, then mark and treat. Yes, one second. That is where you start.
- Gradually increase the duration. Two seconds, three seconds, five seconds. If your dog breaks the stay, you moved too fast. Go back to the last duration they could handle.
- Add distance. Once your dog can hold a stay for 10 to 15 seconds with you right in front of them, take one step back. Mark and return to treat (go to them rather than calling them to you).
- Add distractions. Once duration and distance are solid, add mild distractions - toss a treat to the side, have someone walk past, open a door.
- Add a release word. Use a consistent word like “free” or “okay” to tell your dog the stay is over. This prevents them from deciding on their own when to break position.
The Three D’s of Stay
- Duration: How long your dog holds position
- Distance: How far away you move
- Distraction: What is happening around them
Only increase one at a time. If you step farther away, make the duration shorter. If you add a distraction, stay close and keep the duration short. This is the golden rule.
Troubleshooting
My dog keeps breaking the stay. You are asking for too much too fast. Cut the duration in half and rebuild. Success builds confidence.
My dog creeps forward during the stay. Go back and treat them in the exact position you want. If they are creeping, they are being rewarded too late - after they have already started moving.
My dog gets up as soon as I move. Practice tiny weight shifts before taking actual steps. Lean left, mark and treat. Lean right, mark and treat. Shift your weight to one foot. Build up to an actual step.
Command 3: Come (Recall)
Recall is the most important command your dog will ever learn. A reliable recall means your dog returns to you immediately, every time, no matter what. It can save their life - and it is the hardest command to train well, because you are competing with everything the world has to offer.
Step-by-Step
- Start in a boring environment. Your hallway is perfect.
- Get your dog’s attention, then move backward while saying “come” in an upbeat voice. Moving away from your dog triggers their chase instinct.
- When they reach you, mark and throw a party. Multiple treats, praise, petting - whatever your dog loves. Recall should be the best thing that ever happens to them.
- Practice in gradually more distracting environments. Backyard, front yard, quiet park, busier park. Use a long line (15 to 30 feet) in open spaces so your dog cannot practice ignoring you.
- Never call your dog for something they dislike. If you need to bring them inside, give a bath, or clip nails, go get them. Do not poison your recall cue.
The Cardinal Rule of Recall
Come must always be positive. Every single time your dog comes to you, something good happens. No exceptions. If your dog comes to you and you scold them (even if they were doing something wrong five seconds ago), you just taught them that coming to you is a bad idea.
This is the number one reason people have unreliable recalls. They call the dog and then do something the dog does not enjoy - ending playtime, putting them in the crate, giving medication. Protect this command with your life.
Troubleshooting
My dog looks at me and then goes back to what they were doing. Your rewards are not high enough, or you have accidentally punished the recall in the past. Go back to a low-distraction environment and rebuild with extremely high-value rewards (real meat, not kibble). Use a long line so they cannot self-reward by running off.
My dog comes partway and then veers off. Run away from them. Seriously - turn and run in the opposite direction. Most dogs will chase you. Mark and reward heavily when they catch you.
My dog will not come at the dog park. Do not practice recall at the dog park until it is bulletproof everywhere else. The dog park is a graduate-level distraction. Start with a long line in a quiet field and work up.
Command 4: Down
Down is sit’s more committed cousin. It asks your dog to lie all the way down, which is a more relaxed and vulnerable position. It is useful for settle behavior at restaurants, during longer waits, and as a foundation for “place” or “go to your mat” training.
Step-by-Step
- Start with your dog in a sit.
- Hold a treat at their nose, then slowly lower it straight down to the ground between their front paws. Most dogs will follow the treat down into a down position.
- The moment their elbows touch the floor, mark and treat.
- If your dog stands up instead of lying down, try an “L” shape: bring the treat straight down to the floor, then slowly pull it toward you along the ground. This often lures them into a down.
- Add the verbal cue once the luring is reliable. Say “down” just before you move the treat.
- Fade the lure gradually until your dog responds to the verbal cue or a simple hand signal.
The Stubborn Down
Some dogs resist lying down because it puts them in a vulnerable position. This is especially common in rescue dogs or dogs who are not fully comfortable with you yet. Do not force it. Instead:
- Practice on a soft surface (carpet, dog bed)
- Capture it - wait for your dog to lie down naturally, then mark and treat
- Try shaping it - reward your dog for lowering their head, then for bending their elbows, then for getting partway down
If your dog truly will not do a down, it may be a trust issue. Spend more time on relationship-building before pushing this command.
Troubleshooting
My dog pops back up immediately after lying down. You are clicking too late. Mark the instant their elbows hit the ground. Then work on duration by gradually delaying the click.
My dog crawls forward instead of lying down in place. Try luring into a down under a low table or chair. The physical barrier prevents the crawl.
My dog only does down on certain surfaces. This is a proofing issue. Practice on different surfaces - carpet, tile, grass, concrete. Reward generously on the less comfortable surfaces.
Command 5: Leave It
Leave it tells your dog, “Ignore that thing and focus on me instead.” It is an essential safety behavior. Dogs encounter toxic foods, sharp objects, dead animals, and other dogs’ poop on every walk. Leave it gives you a way to prevent them from interacting with those things.
Step-by-Step
- Hold a treat in each hand. Show your dog one closed fist with a treat inside. They will sniff, lick, and paw at it.
- Wait. Do nothing. Do not say anything yet.
- The moment your dog backs off or looks away from your fist, mark and reward from the other hand. The lesson: ignoring the forbidden thing earns something even better.
- Repeat until your dog immediately looks away from your fist when you present it.
- Add the cue. Now say “leave it” as you present the closed fist. Mark and reward from the other hand when they back off.
- Increase difficulty gradually. Open fist (cover the treat if they go for it). Treat on the floor (cover with your foot if needed). Treat on a table. Treat tossed on the ground.
Advancing Leave It
Once the basic leave it is solid, practice with real-world scenarios:
- Walk past food on the ground (on leash). Mark and reward for ignoring it.
- Practice with items your dog finds tempting - a sock, a toy, a tissue.
- Practice with other dogs or animals at a safe distance.
The goal is that “leave it” becomes an automatic redirect: your dog hears it, disengages from the target, and looks at you for their reward.
Troubleshooting
My dog grabs the treat before I can cover it. You advanced too fast. Go back to a closed fist and get that solid before opening your hand.
My dog leaves it during training but not on walks. You need to bridge the gap between training sessions and real life. Deliberately plant treats on the ground during walks (or have a friend do it) and practice leave it in that context.
Putting It All Together: A Two-Week Training Plan
Here is a realistic schedule for teaching all five commands. Adjust based on your dog’s learning speed - some dogs are faster, some need more repetition.
Week 1
- Days 1-2: Sit (two to three sessions per day, three to five minutes each)
- Days 3-4: Sit + Down (alternate between the two)
- Days 5-6: Sit + Down + Stay (start stay at one to two seconds)
- Day 7: Review all three, identify weak spots
Week 2
- Days 8-9: Add Come (in hallway or small room)
- Days 10-11: Add Leave It (closed fist exercise)
- Days 12-13: Practice all five commands in short, varied sessions
- Day 14: Start proofing in the backyard or another new space
This is a starting point. Some dogs will fly through this in a week. Others - especially older dogs or rescues with limited training history - may need three or four weeks. Both are fine. The pace does not matter. The consistency does.
Beyond the Basics: What Comes Next
Once your dog has these five commands down, you have a foundation you can build on for the rest of their life. Some natural next steps:
- Loose leash walking: Now that your dog knows sit and stay, you can start teaching polite leash manners.
- Crate training: Combine “down” and “stay” with crate introduction for a smooth crate training process.
- Place/mat training: Teach your dog to go to a specific spot and stay there - perfect for meal times, guests, or working from home.
- Heel: A more formal version of loose leash walking where your dog stays at your side.
For the full picture of where training goes from here, head back to our complete dog training guide.
Frequently Asked Questions
At what age can I start training my puppy?
You can start the moment you bring them home - as young as eight weeks. Puppies are sponges for learning at this age. Keep sessions extremely short (one to two minutes) and use tiny, soft treats. Focus on sit and name recognition first.
My adult dog has never been trained. Is it too late?
Not even close. Adult dogs learn just as well as puppies - and they often have better focus and impulse control. The process is identical. Start with sit, work through the list, and be patient. Most untrained adult dogs show dramatic improvement within two to three weeks.
How many commands can a dog learn at once?
Most dogs do best learning one new command every two to three days. Once a command is introduced, you can practice it alongside others. Avoid introducing more than two new commands in a single session - it gets confusing.
Should I train before or after meals?
Before meals, if your dog is food-motivated. A slightly hungry dog is a motivated dog. If your dog is not very food-driven, try using their entire meal as training rewards rather than feeding from a bowl.
What if my dog will not take treats during training?
Your dog is too stressed, too distracted, or not hungry enough. If they are stressed (new environment, something scary happened), reduce the difficulty. If they are distracted, find a quieter space. If they are not hungry, train before meals or use higher-value treats. Some dogs are also more motivated by toys or play - use whatever currency your dog values most.
Do I have to use treats forever?
No. As behaviors become reliable, you gradually fade treats and transition to variable reinforcement (treating randomly rather than every time) and life rewards (access to things your dog wants - going outside, getting to greet someone, playing fetch). But you should always reward your dog for good behavior in some form. Would you keep showing up to work if they stopped paying you?
Can I use these same methods for a rescue dog with unknown history?
Yes. Positive reinforcement is especially well-suited for rescue dogs because it builds trust rather than relying on intimidation. Start slow, use high-value rewards, and let the dog set the pace. If your rescue shows signs of fear or anxiety around training, consult our dog anxiety guide and consider working with a professional positive reinforcement trainer.